Proxmox and incorrect Windows RAM reporting
When Windows Server 2016 is first installed in a Proxmox virtual machine (or any version of Windows, actually), RAM usage is reported incorrectly. Very incorrectly, in fact; the Proxmox web GUI makes it look as if Windows Server is using nearly all the RAM available to it. Never fear though — Windows is actually not using that much memory, and fixing the issue is trivially easy and only takes a few minutes.
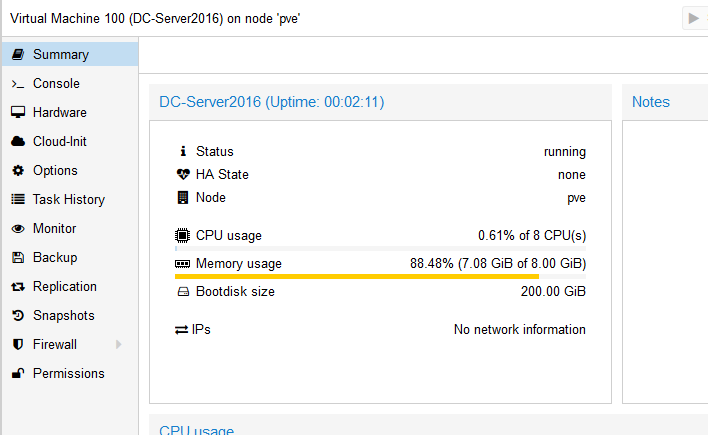
Note the high RAM usage reported in Proxmox. This server has just booted and is running no software or services other than Windows itself. Why would it be using nearly 8 GB of RAM just running idle? Turns out, it’s not…
So Proxmox thinks our Windows Server VM is hogging nearly all the available memory. A quick peek at the Windows Task Manager reveals another story:
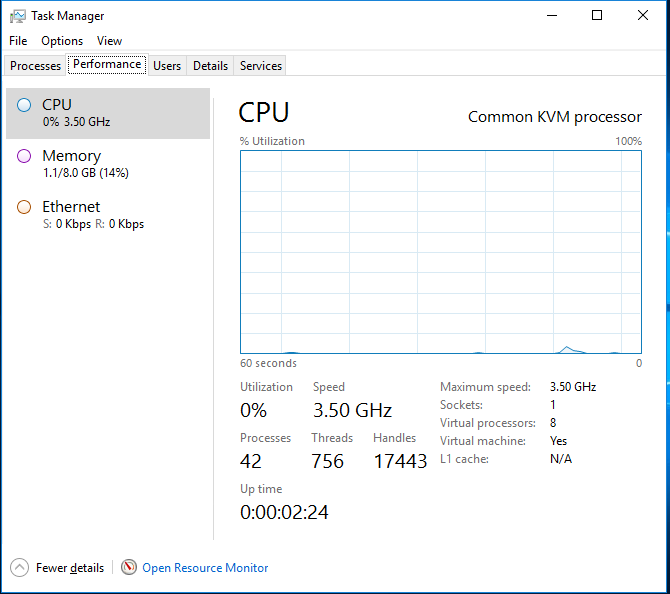
Windows reports 1.1 GB used, not 7.
So Windows is actually using 1.1 GB of RAM, or 14% used, while the Proxmox interface reports 7 GB, or 88%. The fix to this lies in installing the Balloon driver, which runs as a Windows service and reports correct RAM usage information to the Proxmox host. To install the Balloon driver, we’ll need to mount the “virt-io” drivers ISO image as a CD drive. The following two articles have some help on how and where to find this ISO image, how to mount it as a CD drive, and so on.
Adding Windows drivers for installation in Proxmox VE Windows guests
Converting Windows VM hard disk to VirtIO
With the VirtIO driver ISO loaded as a CD drive, open Windows Explorer, click on This PC, and double-click the virtio CD drive; open the Balloon directory, and choose the correct subdirectory for the version of Windows you are running. Select the “amd64” directory and hit Ctrl + C to copy it to the clipboard (or right-click and hit Copy if you like your mouse more than I do).
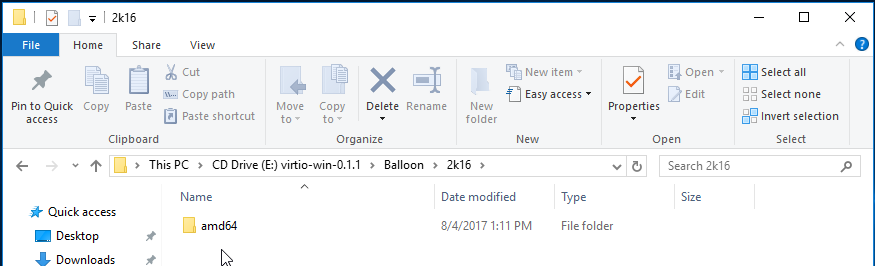
Note the path. Choose the appropriate folder according to your version of Windows (here, I’ve chosen the “2k16” directory for Server 2016).
Now navigate to C:\Program Files and paste in the “amd64” directory.

Paste the amd64 directory into Program Files.
Rename the directory; call it “Balloon.”

Rename the directory.
Now open a command prompt as administrator. (click Start; type “cmd” (minus the quotes); right-click on “Command Prompt” and click “Run As Administrator.”) At the elevated command line, change directories to C:\Program Files\Balloon and run “blnsvr.exe -i” as shown below. This installs the balloon service.
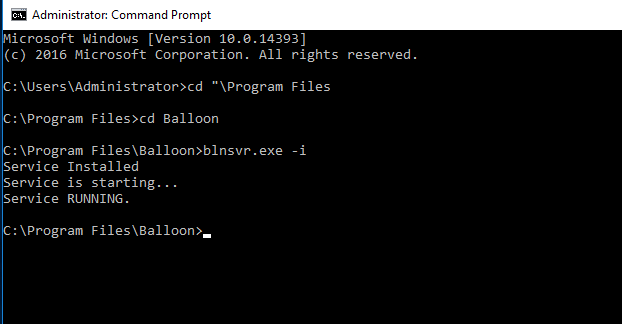
Success. Balloon service installed and running.
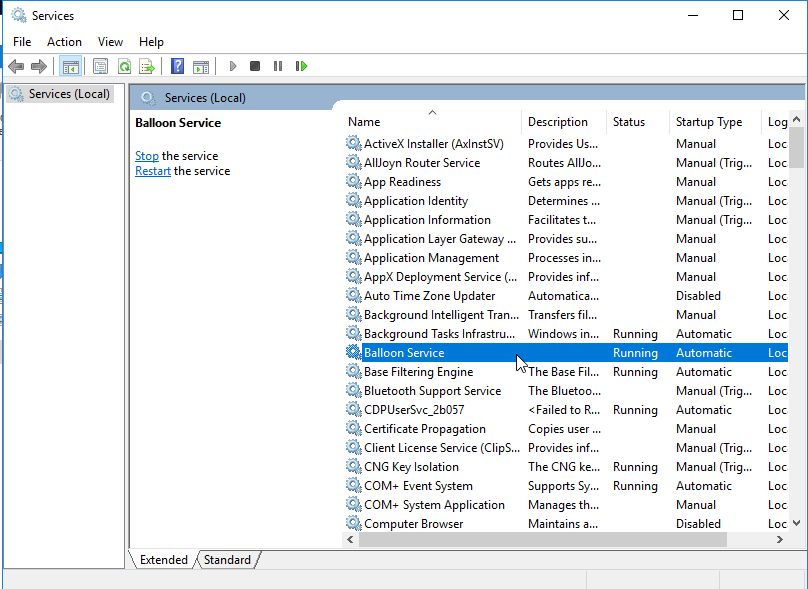
Verify that the balloon service is indeed running by opening Services (run services.msc).
And now, back over to Proxmox. RAM usage reporting is now accurate!
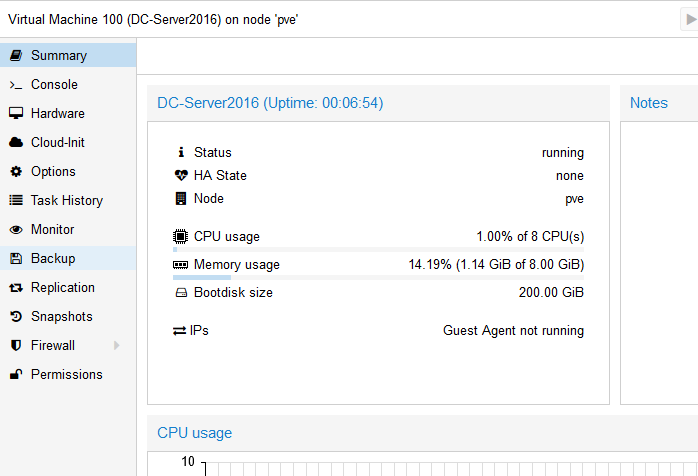
This looks much better and is now in line with what Windows Task Manager told us.
Further steps for Windows guests
In the VirtIO CD drive within Windows, navigate to the “guest-agent” directory and run the file appropriate to your architecture to install the KVM guest agent. (Pick the x64 file if on a 64-bit machine; x86 if 32-bit.) And within the Proxmox web interface, go to the Options page for the virtual machine in question and enable the QEMU Agent.