Converting Windows VM hard disk interface to VirtIO with Proxmox VE 5
How can you change the hard disk interface from IDE or SATA to SCSI or VirtIO without breaking Windows startup?
Part of my job of migrating from VirtualBox to Proxmox involved moving two Windows virtual machines: one running Windows 7, and one running Windows 10.
I imported the Windows disks using the same process outlined in this article, but soon discovered that unlike the Linux VMs, which booted right up on VirtIO drives with no configuration needed, Windows did not support VirtIO natively. I got the Windows 10 machine running by connecting the drive with SATA; once this was working, I installed the necessary drivers and switched the virtual drive interface to VirtIO.
The Windows 7 VM didn’t even like SATA.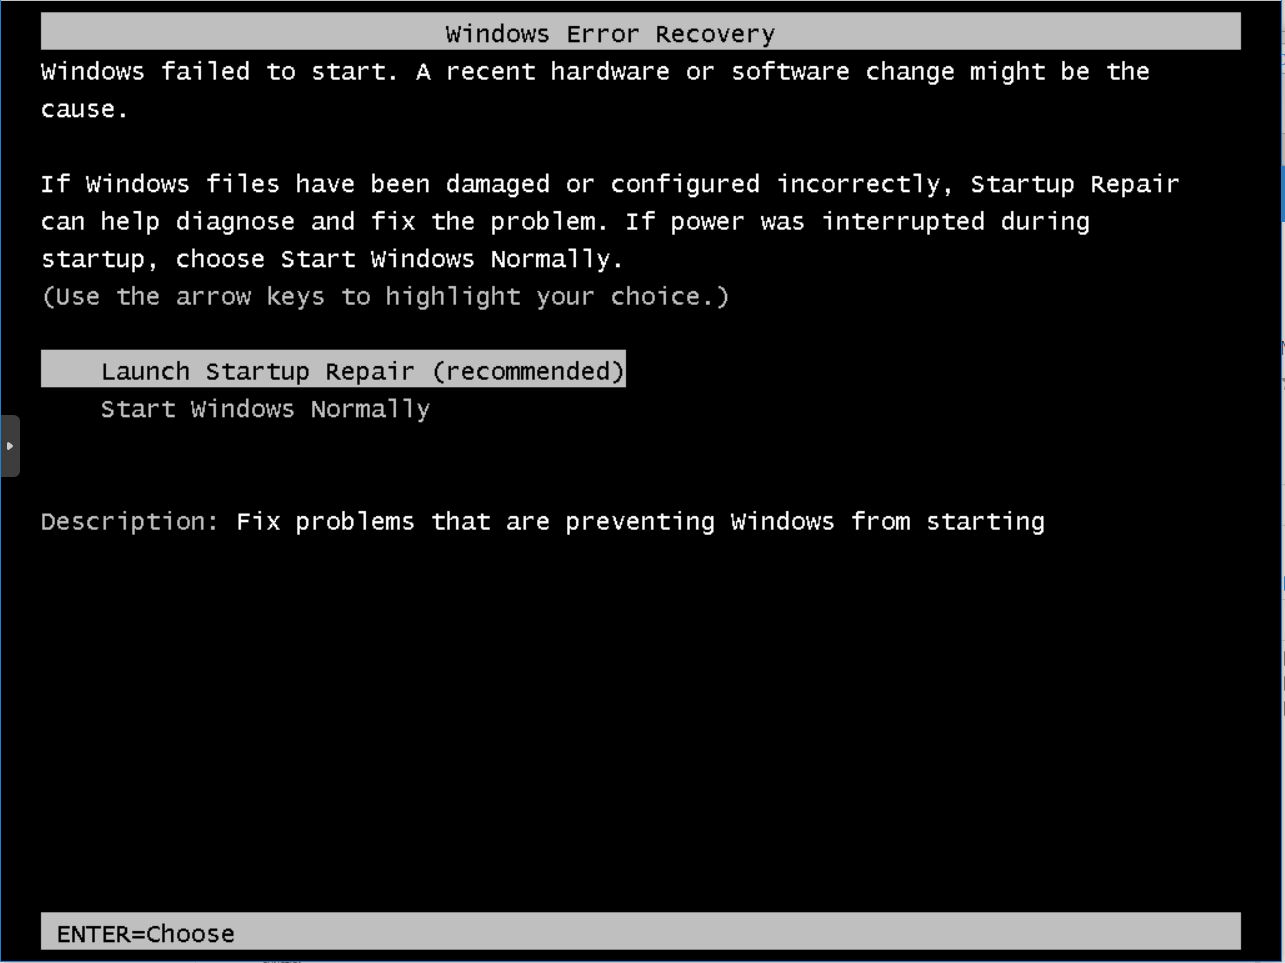
I had to disconnect the hard disk and add it again, selecting IDE as the interface type; this allowed Windows 7 to boot successfully.
Once you have Windows booting and running successfully, you can install VirtIO or SCSI drivers and switch your hard disk interface over. But how can you install drivers for hardware that’s not connected to Windows?
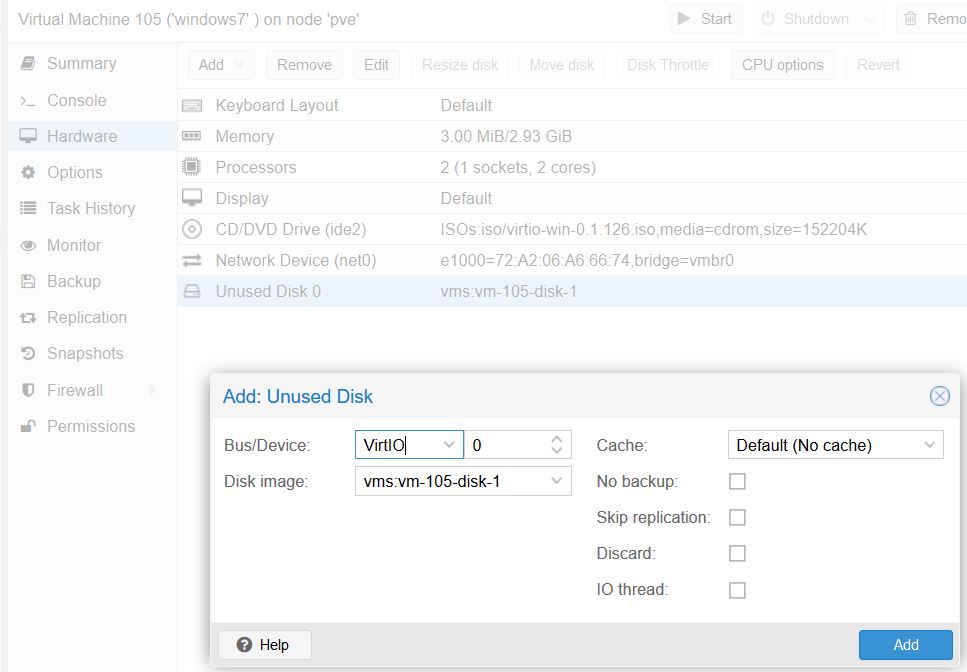
It turns out that the process is fairly simple. We’ll add an additional hard drive to the Windows VM, setting its interface type to VirtIO. Storage location and format are not critical; we’ll remove this disk later when we’re done with it. Just store it anywhere, and click Add.

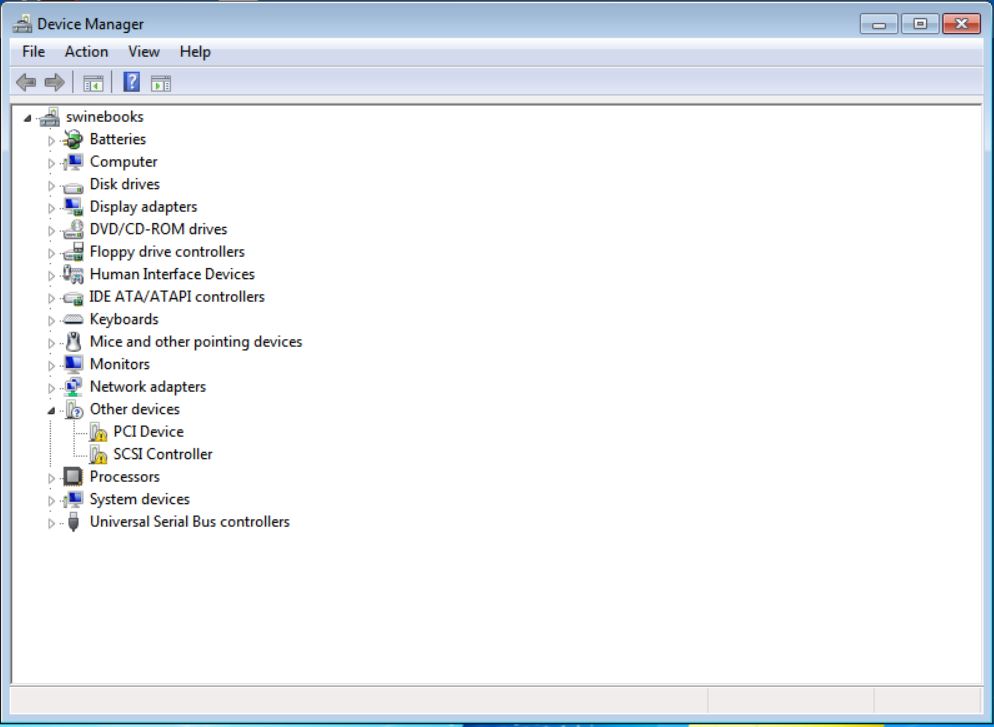
Next, boot up the Windows VM and take a peek in Device Manager; you should see hardware with drivers not installed, marked by yellow warning triangles. The first one turns out to be the Balloon driver (more on that in a minute); the second one is obviously our hard disk controller. Adding a hard drive to the machine using a different interface made Windows see new hardware, which allows us to install appropriate drivers.
So we’re going to have to install drivers for those devices. I’ll add my “ISOs” folder to the Windows machine as a CD drive (click here for more information on how to prepare this folder, where to download its contents, and so on).
To add this CD drive, (1) in the virtual machine’s Hardware tab select the CD/DVD drive; (2) click Edit in the toolbar; and (3) select the appropriate folder and ISO image; and click OK.
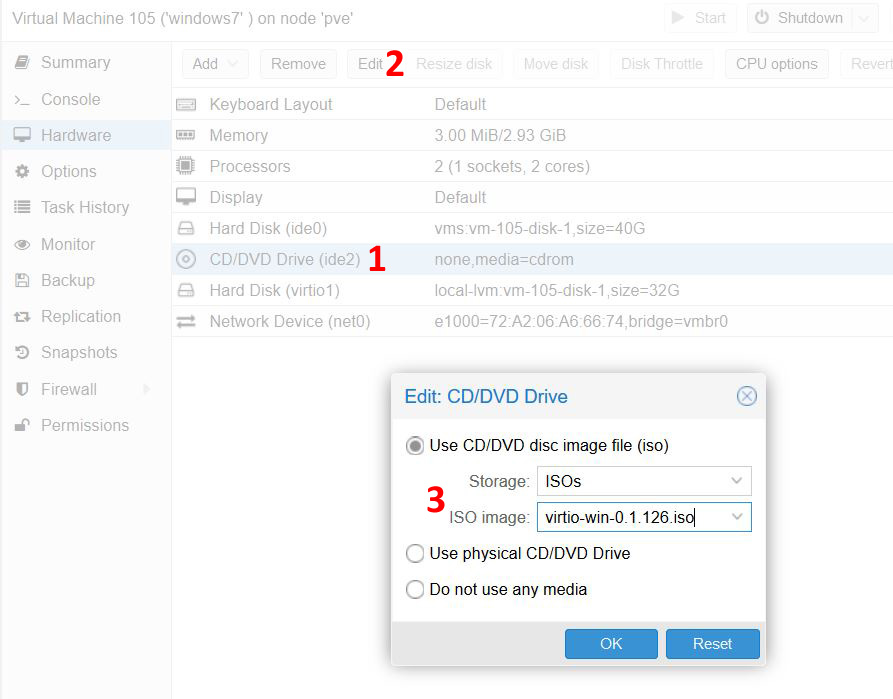
When you click OK, it’s just as if you had placed a CD into the drive of a physical machine and closed the drawer. Windows recognizes the drive, asks what you want to do with it, etc. Take note of the drive letter assigned (likely D:).
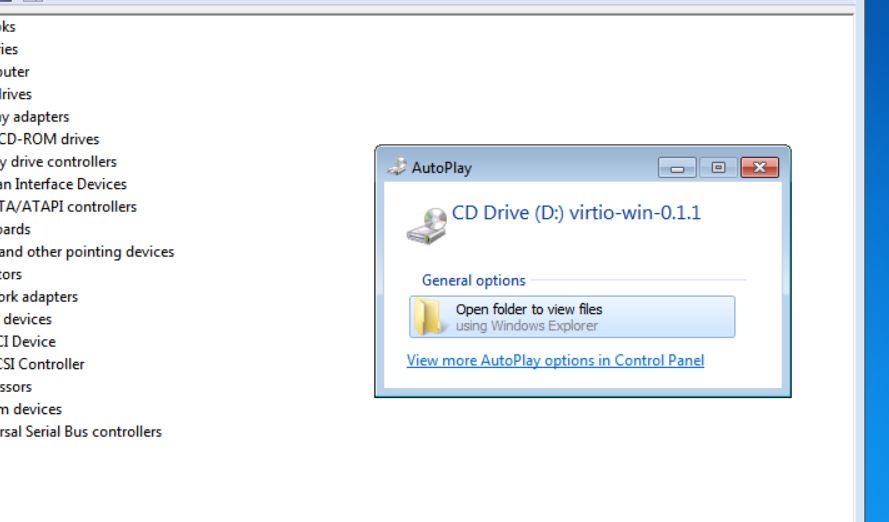
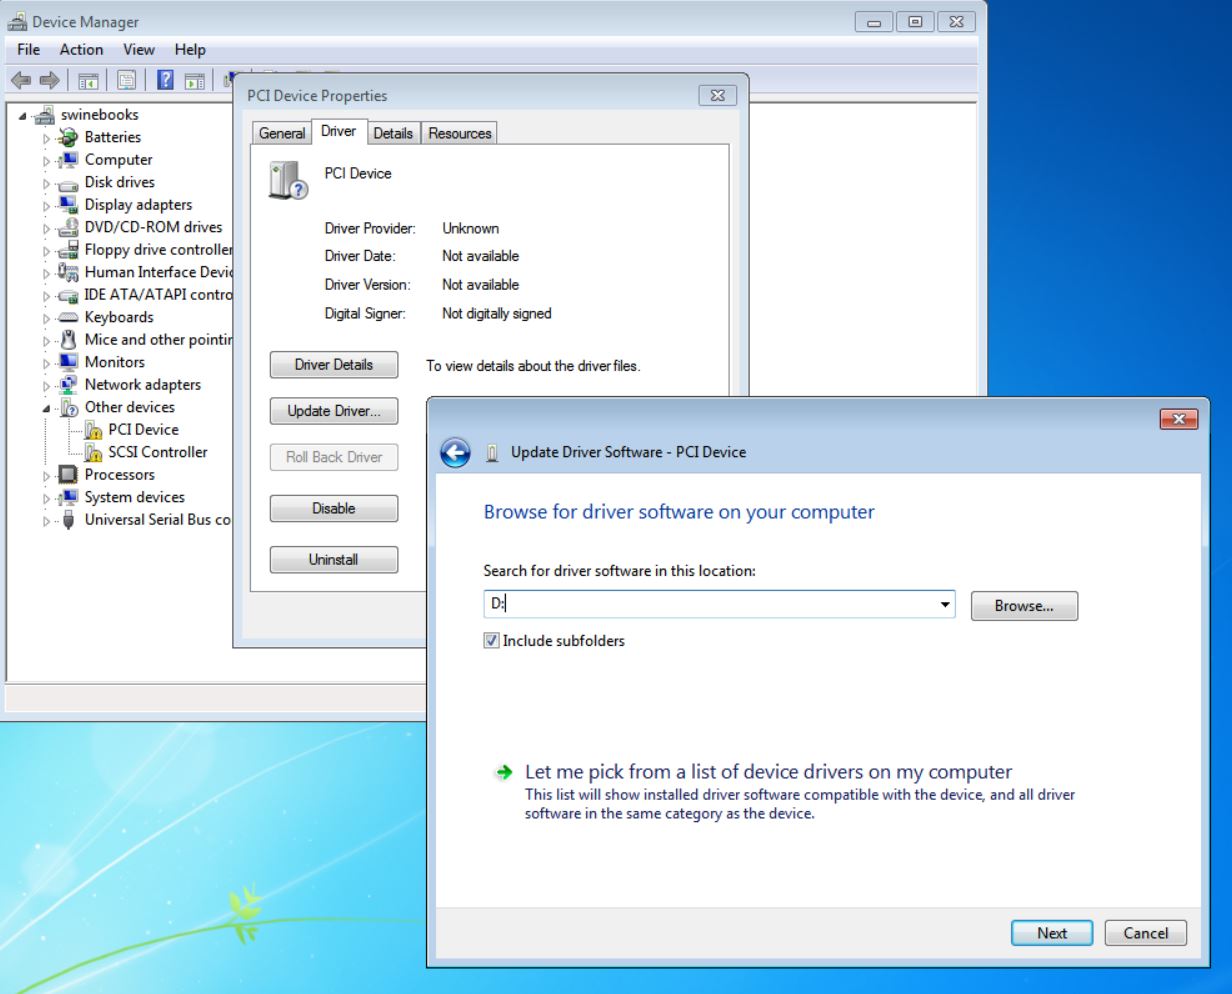
Once the drive letter has been duly noted (in my case the CD drive is D: ), you can close the AutoPlay prompt. Back in the Device Manager, double-click on one of the devices that needs drivers. (Or, right-click on it and click Properties.) I’ll pick the “PCI Device” first. Select the Driver tab, and click Update Driver; and then click “Browse my computer for driver software.”
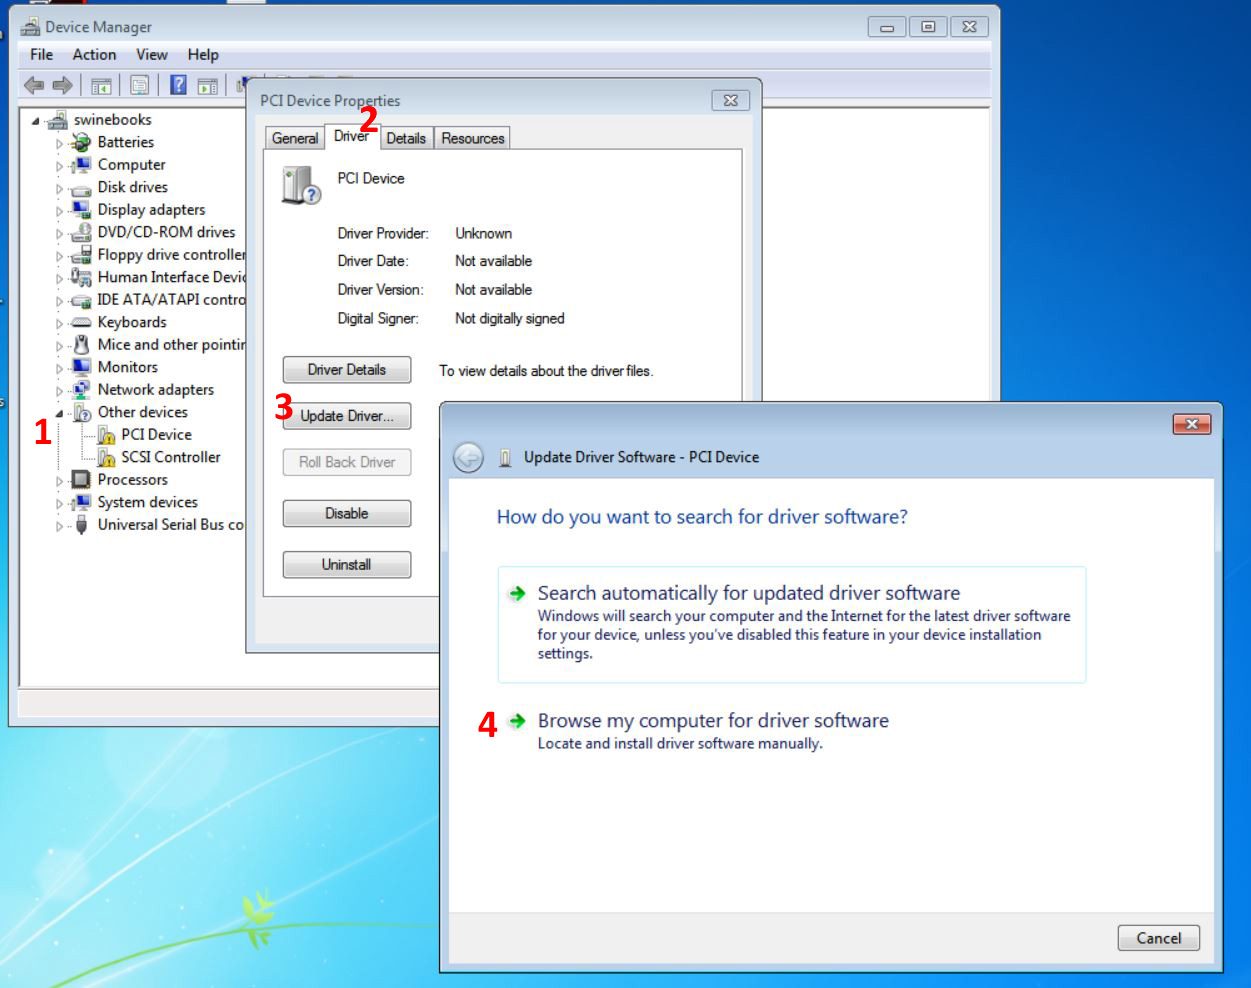
In the Search Location box in the next part of the wizard, simply enter the CD drive letter followed by a colon; make sure “Include subfolders” is checked; and click Next. What this will do is allow Windows to search all the subfolders of the CD drive and pick the appropriate driver automatically.
After a short pause, you should see something like this. Click Install to allow driver installation to proceed.
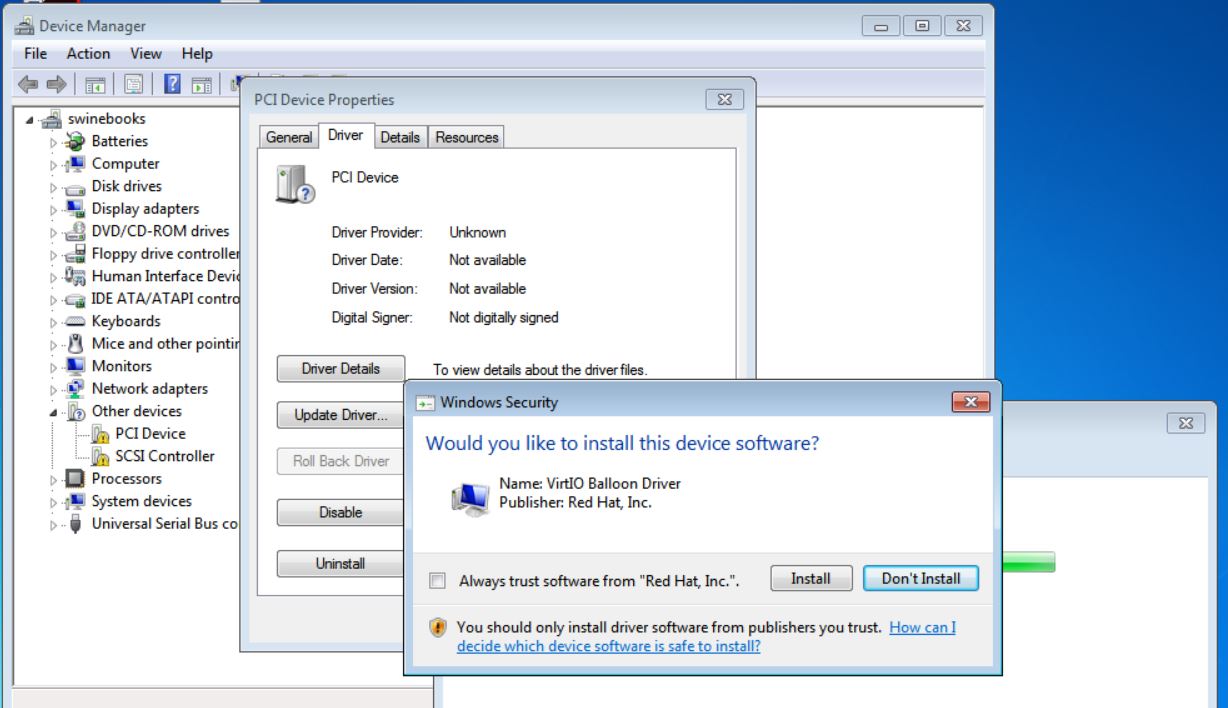
In the screenshot above, Windows is installing the VirtIO Balloon Driver. This is a driver that allows Windows to report the correct amount of RAM being used to Proxmox; without it, the percentage of VM RAM being used as shown in the Proxmox dashboard’s machine summary can be very inaccurate.
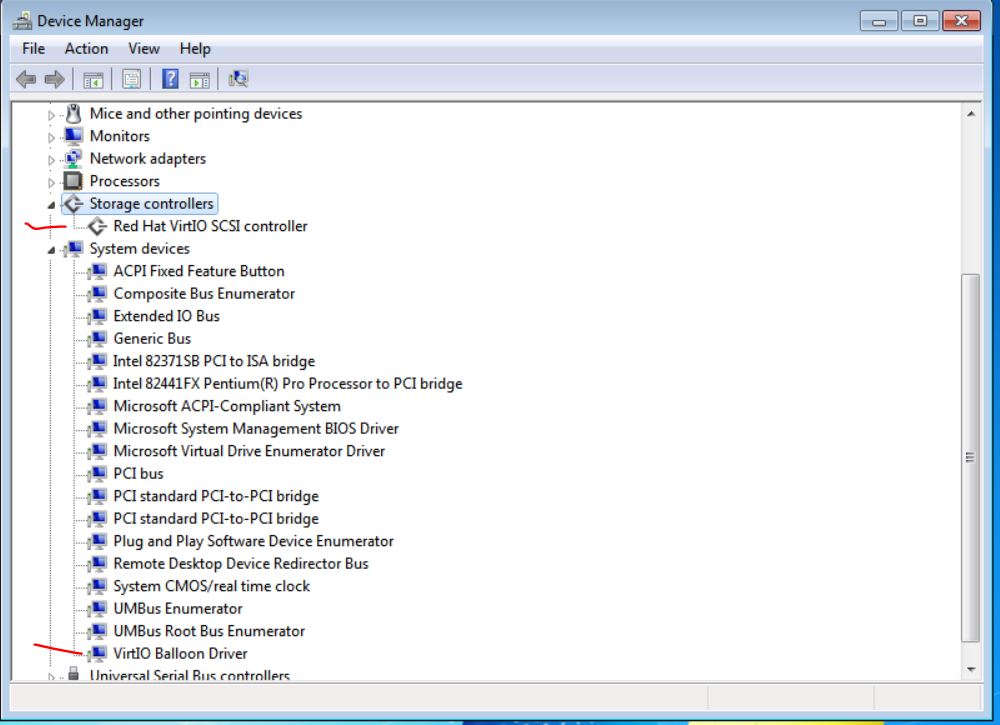
When the driver install is complete, close the window telling you the driver has been installed successfully, and close the “PCI Device Properties” window. We’ll repeat the last few steps for the SCSI Controller, installing its driver in exactly the same manner.
When done, no devices in Device Manager should be marked with the yellow triangle any longer. Here you can see the Balloon Driver and the VirtIO SCSI driver, installed and working properly (both marked with red ink below).
Shut down the virtual machine. When it’s powered down, head over to the Proxmox web interface and remove the temporary hard disk we created earlier. Two remove steps are needed; the first detaches it, making it an “unused disk”; the second step removes the drive from Proxmox altogether.
With that done, detach the IDE boot disk. Select it and click Remove, changing it to Unused Disk also. Then double-click the unused disk and add it to the VM again, this time selecting VirtIO as the interface.
Now set the VirtIO disk as the first boot option.
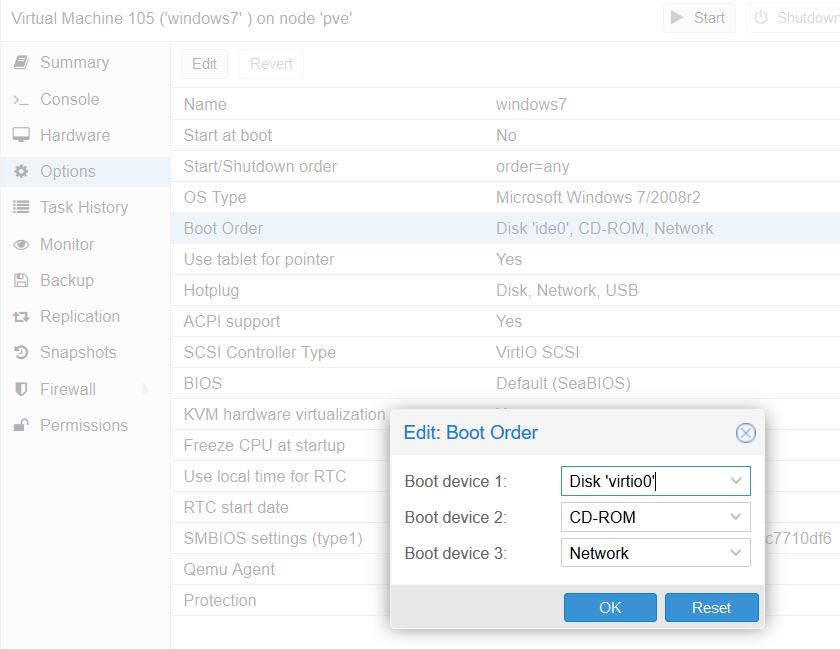
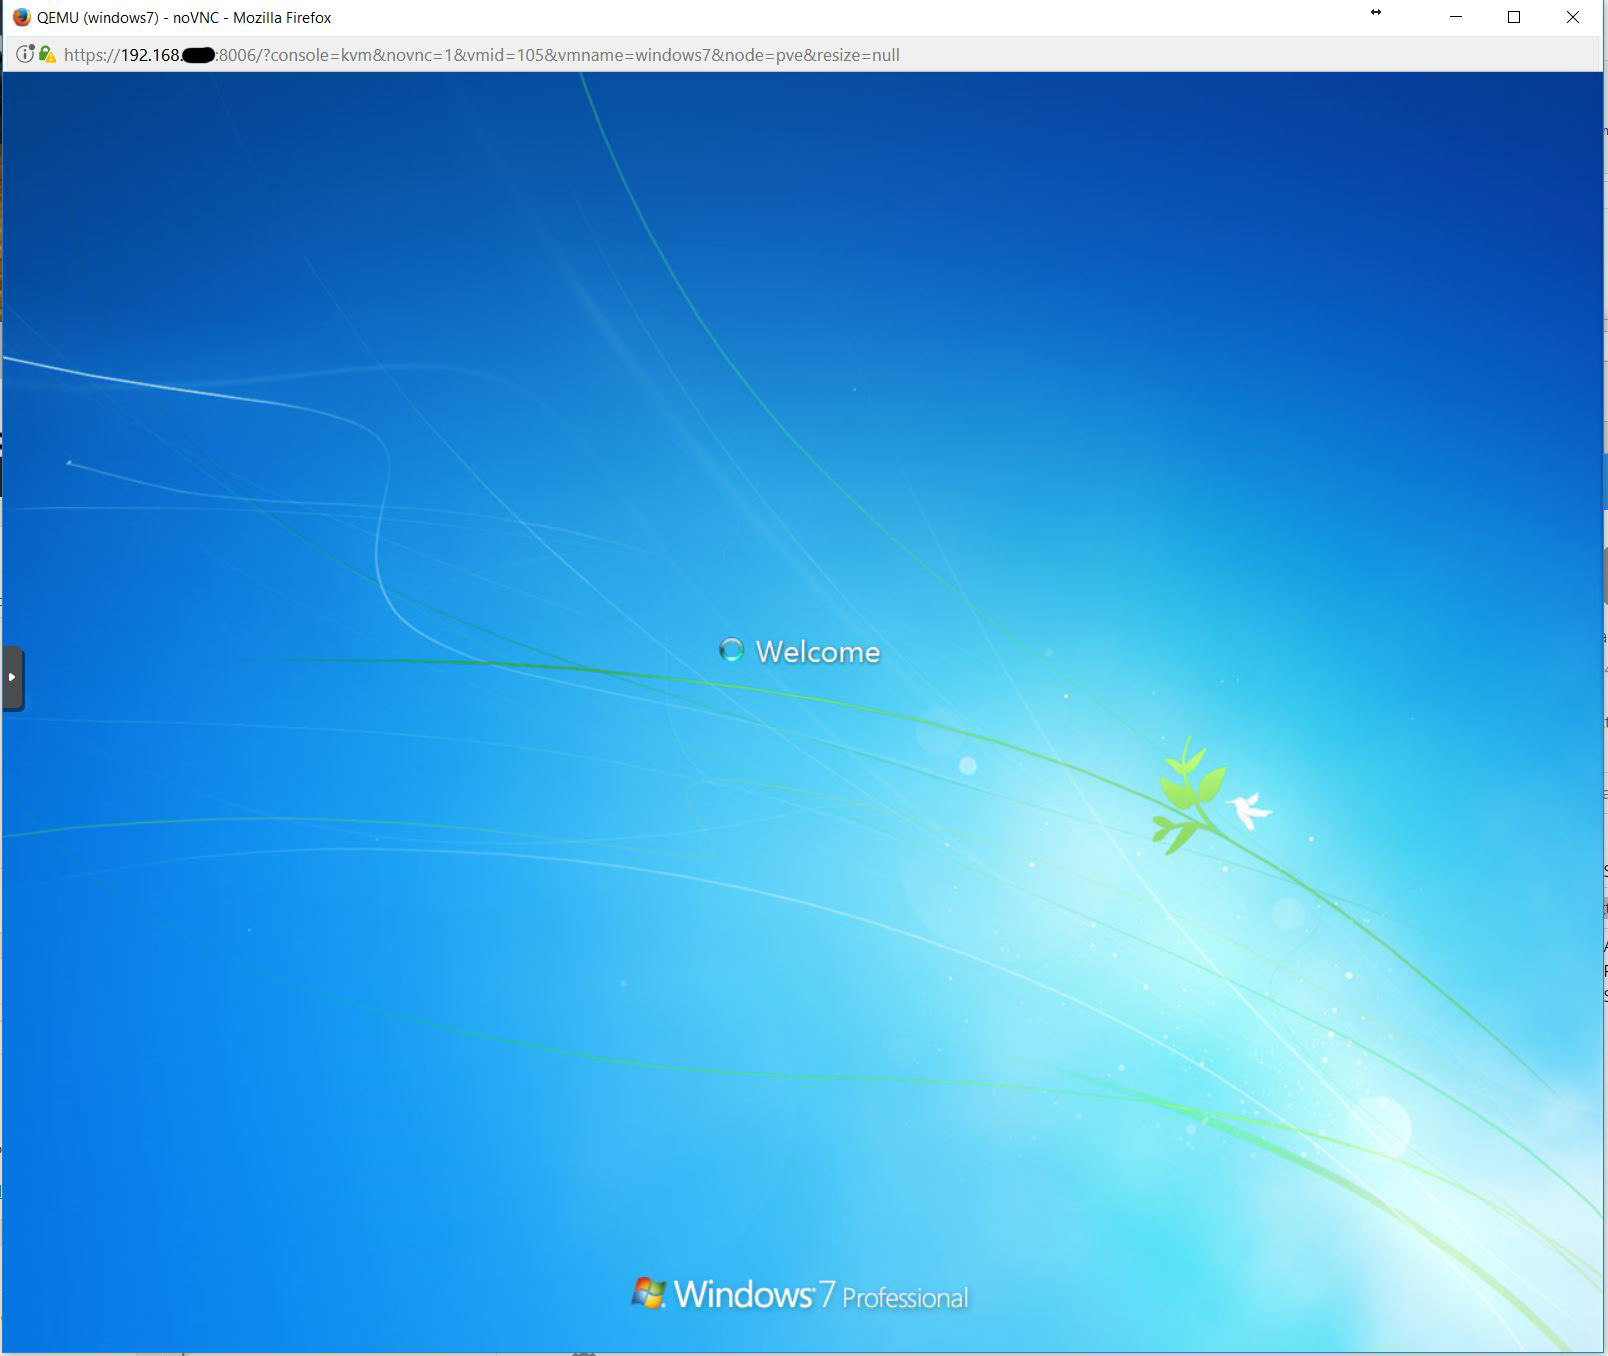
Start the VM and watch it boot using the NoVNC Console; ensure it boots successfully.
That’s it. Enjoy the increased performance of VirtIO, and I wish you success with Windows activation on the new host!