
Heating System Control with a Raspberry Pi, Part 1: The Build
I’ve had two Pi’s in my office for a couple years now. Other than being an intriguing little computer, and occasionally a “typing machine” for my young children, I hadn’t really found a good use for them… until a heating system upgrade made an unexpected little problem and the Raspberry Pi seemed a fun solution. Read on!
The Problem:
My house and office are separate buildings. Up until this year, an outdoor wood pellet furnace heated water for radiant in-floor heat for both buildings. The furnace was close to the office and pumped hot water through insulated underground piping to both buildings. With that system, the outdoor furnace and the indoor heating systems were independent of each other; no communication was needed between thermostat and furnace. The furnace simply maintained its water tank temperature in a preset range and had its own controls to do this. When the thermostat called for heat in house or office, a circulation pump started. With cool water flowing into the furnace, its temperature dropped rapidly and it lit itself and heated water. When it got ahead of demand and its water jacket reached the maximum set point, it shut back off. Simple.
This year, for a variety of reasons, we got rid of the outdoor pellet stove and installed a high-efficiency propane boiler in the house basement. Among other changes, this furnace now needs to know when a thermostat somewhere is asking for heat. No hot water is stored; water is heated on demand. When a thermostat calls for heat, we now need to cross two pins on the furnace to start it in addition to starting the circulation pump to send hot water through the pipes in the floor.
Why is this a problem? Because I only have one cable buried between the office and house—a Cat5 cable used for networking the two buildings together. And I didn’t feel like burying another cable for the thermostat wire. But winter was coming and I wasn’t going to work in a cold office either… so, we have to figure out how to tell the furnace to start from the office, utilizing the computer network.
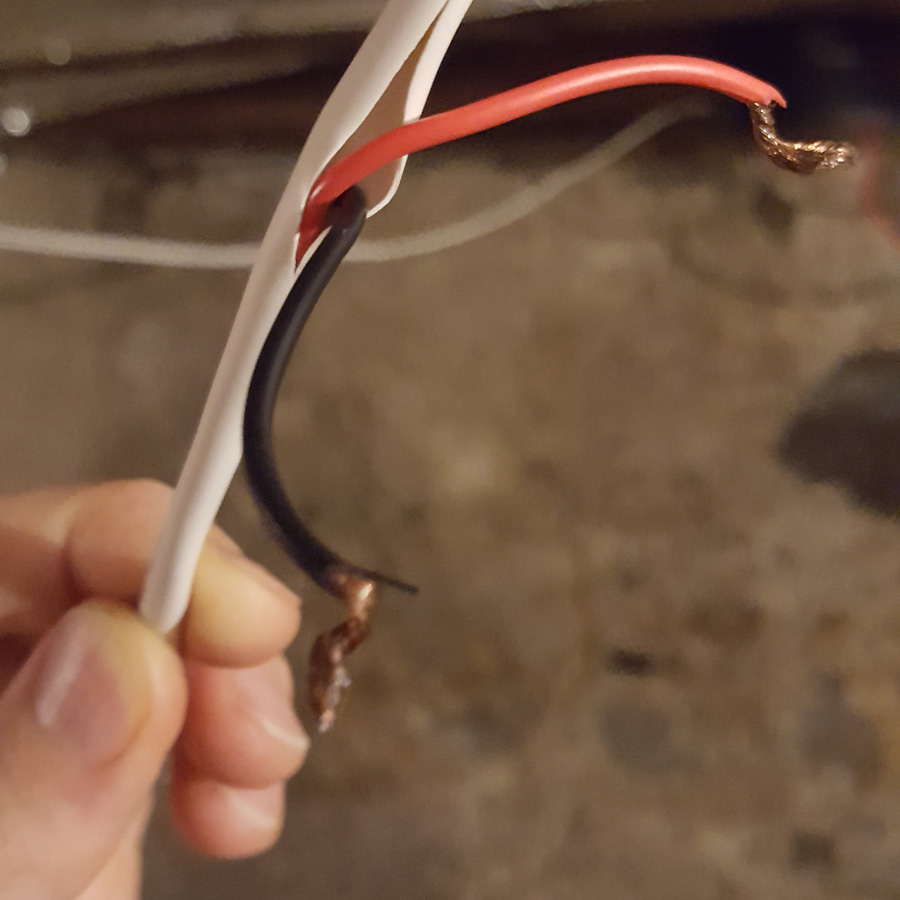
The first version of our office temperature controller. Hey, we needed heat right away! This is low voltage — just crosses the thermostat terminals in the iLink pump / furnace controller.
Needing heat in the office, and not yet having a good way to turn it on (no time for the Pi-based controller right away), for several days I would run to the house basement to twist two wires together to turn heat on (see picture, above). When warm enough, I had to take another trip to the house, descend the stairs, and un-twist the wires again. Not an ideal solution—clearly, we need something better!
The Solution: Raspberry Pi
All right, with the history lesson done it’s time to eat some delicious Pi. We need to send a signal over the network to the house, and that signal is going to have to turn on the furnace and the circulation pump sending hot water underground to the office. I had a couple Raspberry Pis lying around that I had never found a really justifiable usage case for; this seemed a perfect opportunity to harness them for a project that should be educational and enjoyable as well as useful. And it’s a techy way to heat a techy office, which somehow seems fitting!
This project is going to have to happen in phases. The goal may be a bit lofty and I’m not sure if we’ll get all the way there or not, but I’d like to keep building on this concept (as time permits) until I have a little web page where I can log in and check building temperatures, system water temperatures, maybe get a graph showing furnace on / off times… and, of course, turn the system on and off and change thermostat temperature set points. (If you have any pointers on ways to do this: what Python-based web framework you’d use, what libraries may be handy, or anything, chime in with your comments below!) This setup offers the distinct advantage of being controllable from anywhere I can get internet access and connect to my VPN. I don’t think any ports will be directly forwarded to this, for security reasons. I don’t want hackers changing my office temperature–or somehow exploiting my humble Pi furnace control application as an attack vector to gain access to the rest of our network.
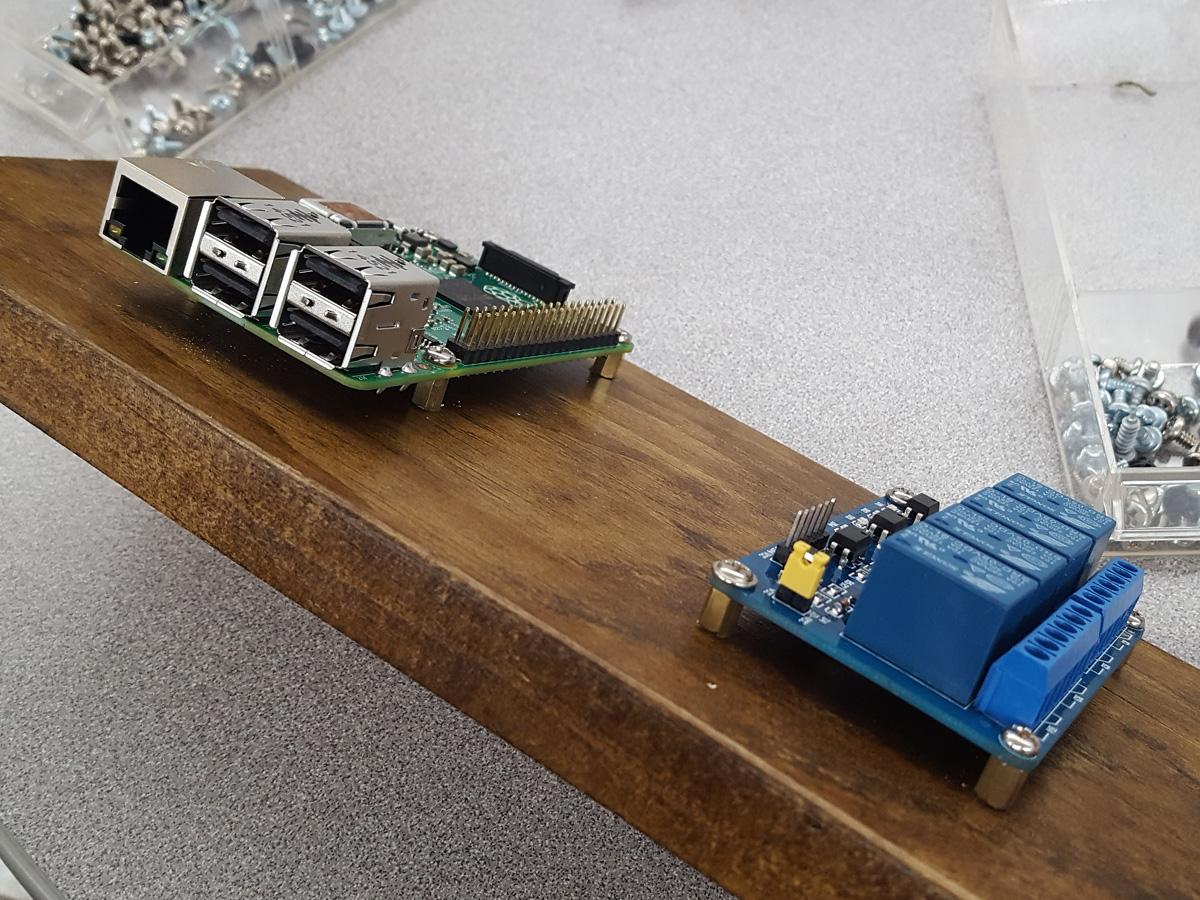
Step One: Collect Components and Build a control board
We need a relay board that is controllable from the Pi’s GPIO pins. I spent some time on Amazon and bought a couple relay boards. With optocoupled inputs, on / off indicator lights, and four 10-amp relays all for an unbeatable price, what’s not to like? These boards are also available in an 8-relay configuration if your project will involve more circuits.
Here’s the construction process in several pictures.
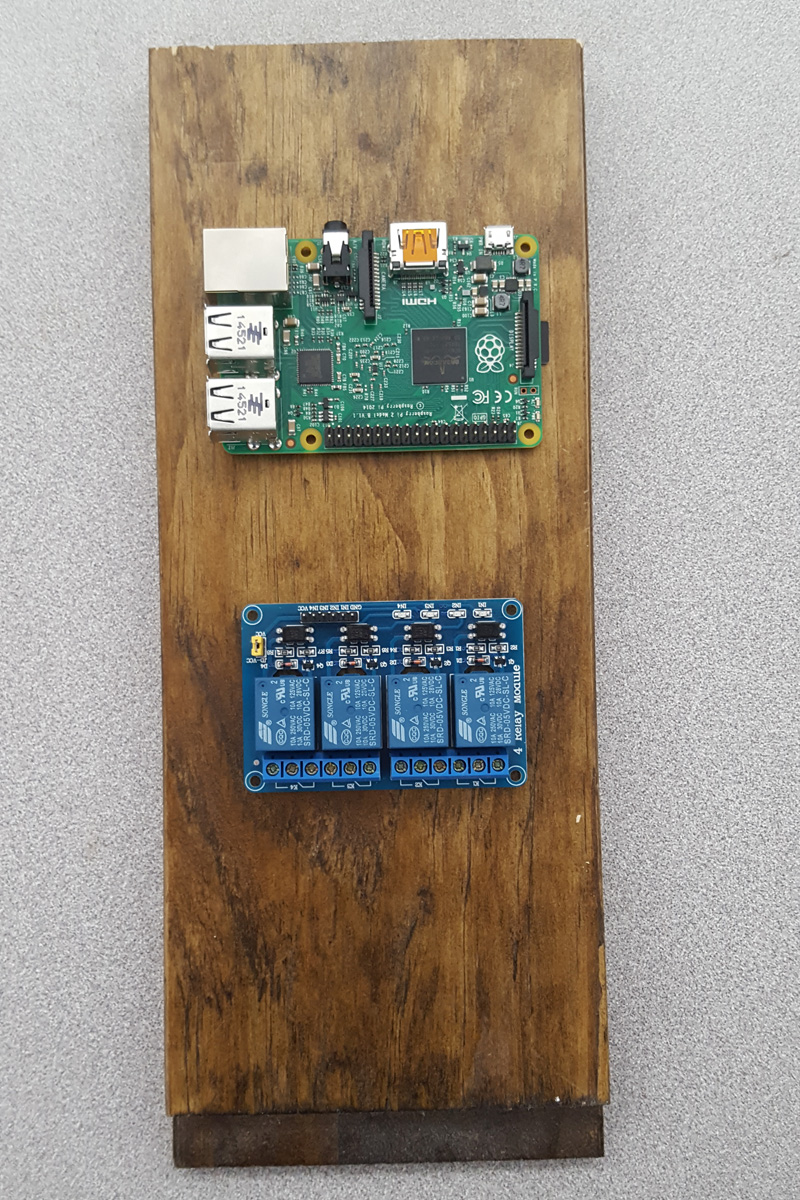
I selected a leftover piece of window trim and laid out the Pi and relay board on it. Everything will be out in the open where I can easily see what’s going on and make wiring changes if necessary. It’s all low voltage at this point anyway, so safety is not an issue.
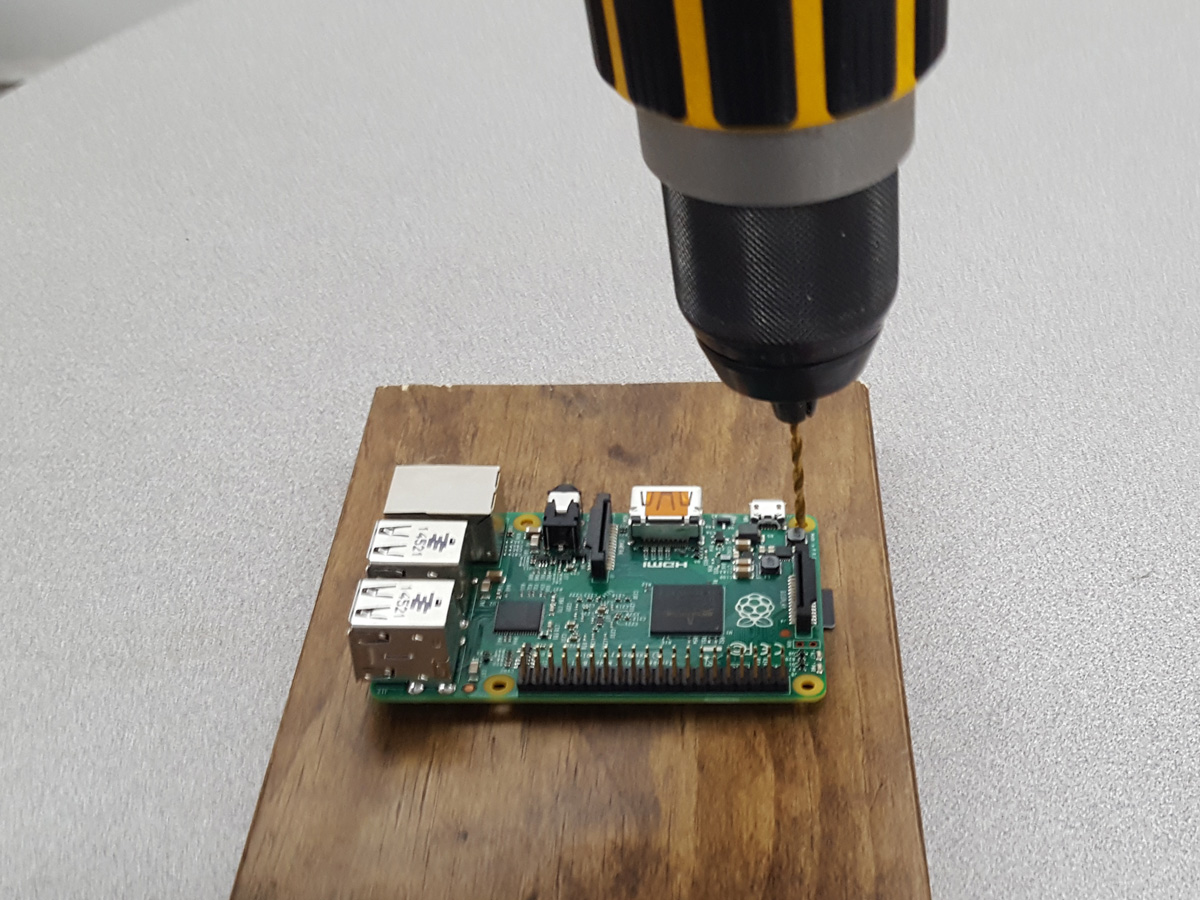
Using a small drill bit to mark where the holes need to be drilled for standoffs
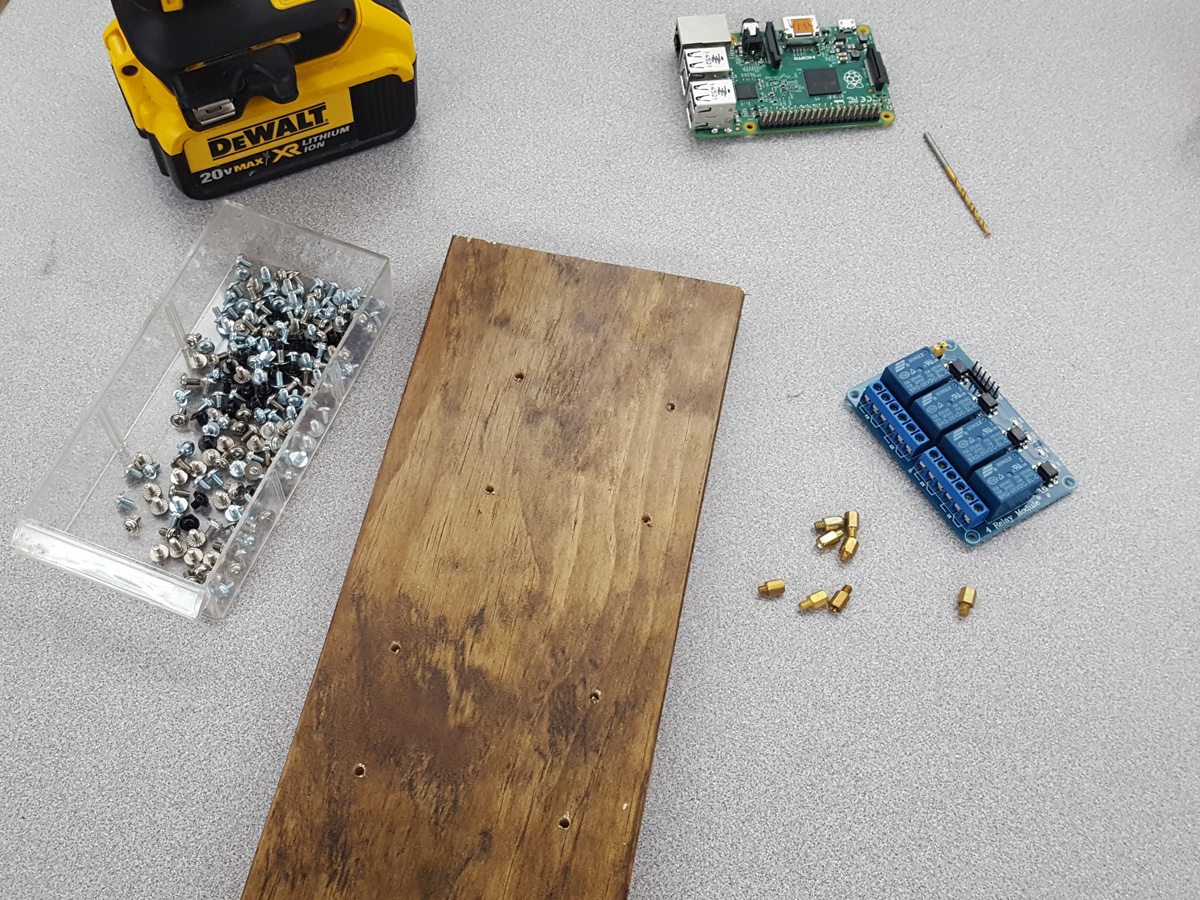
Holes drilled, ready for standoffs, which can be seen to the right. These are motherboard standoffs, leftovers from custom computer builds.
Side view showing standoffs inserted into holes drilled into the board; an the Pi and relay board mounted. I was going to glue the standoffs into the holes (just with some hot glue) but they fit so tight that I didn’t bother.
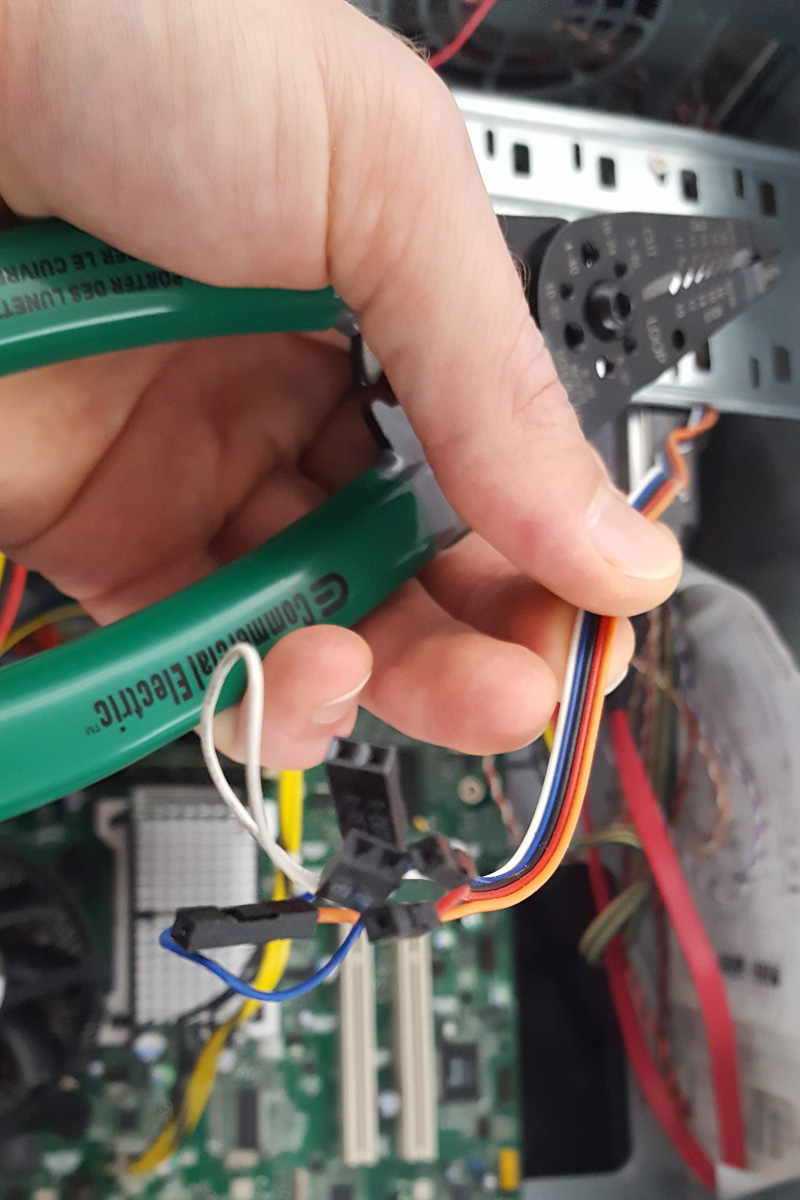
I robbed some wires from an old dead computer on the junk pile — the connectors for power button, power and hard drive LEDs, etc, for a tidy way to plug into the GPIO pins on the Pi as well as the pins on the relay board. These wires only have a plug on one end, so to create cables with connectors on either end I simply spliced wires together.
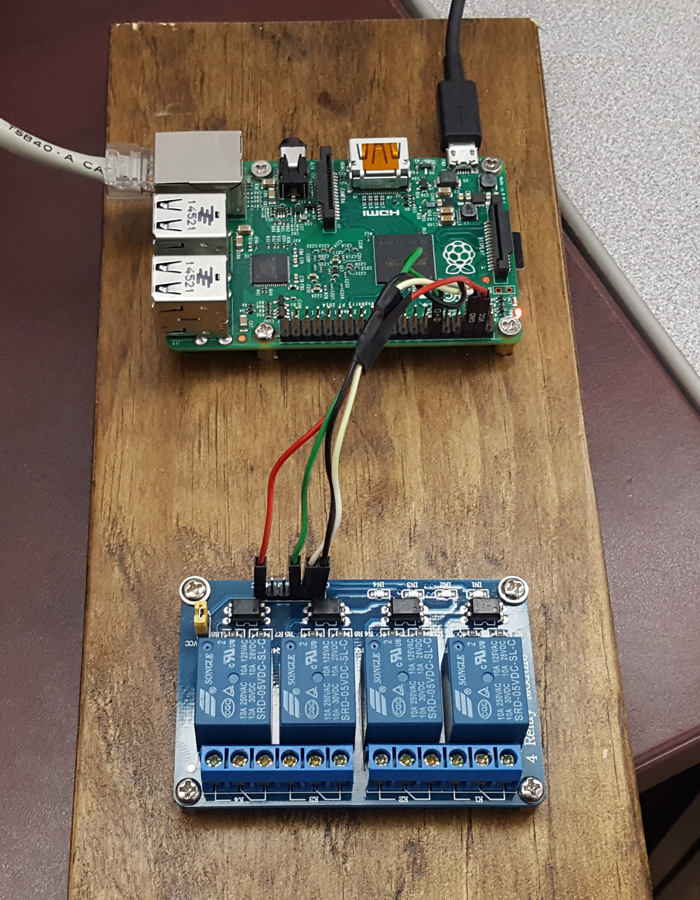
Behold the completed furnace control board! Well, complete for now anyway… Two wires are used to supply 5V DC from the Raspberry Pi to power the relay board; the other two control the first 2 relays (the two on the far right). We’ll actually only use one relay in the first phase of the project, but why not wire up more than one right away?
Next is the programming needed to make this work. This system has been saving me trips up and down the basement stairs for some time now–the wire twisting is long over! Look for Part 2, coming as soon as I have time to write, where we use a little bit of Python to make our Pi control the furnace!


Not sure how this project is coming for you, but I just bought a kit of miscellaneous hardware (still in the mail) that has a couple basic analog temperature sensors and a more advanced temperature and humidity sensor, just in case you’re looking for something like that. I’m starting a project with my Pi, and was wondering if you still have a few of those standoffs yet? If you don’t really have many I can buy a bunch of eBay.
“Not sure how the project is coming…” Ha, thanks for the poke, and sigh… it’s been a wild winter. You know how it goes: once something reaches the point where it’s doing the job, the further steps of refinement and polish seem to take a back seat to more pressing items. I want to refine this project further but my office has been warm all winter thanks to cron running overnight heating jobs for me, and my simple commands over SSH to the Pi to turn on heat when I get a little chilly… Yeah I know, it’s still not very automated and certainly not ideal — but hey it sure beats running to the basement to twist wires together to turn on the heat!
I’d be interested in a temp sensor or so, for sure. I’ll PM you regarding that, as well as the standoffs.
-Joel
A quick search on github.com turned up this thermostat setup for Raspberry Pi that looks similar to what you are planning, using Python and PHP. https://github.com/Willseph/RaspberryPiThermostat
Likely there are others as well, but this one seems to be the closest that I can find.