
Raspberry Pi Setup, Part 2: Change Default Raspberry Pi Password and Set Static IP Address
For our first article on the Raspberry Pi, detailing how to install an operating system, click here.
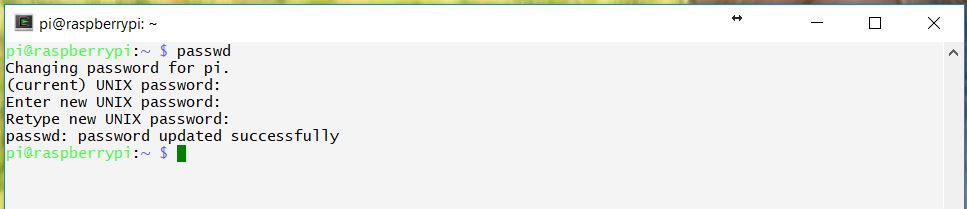
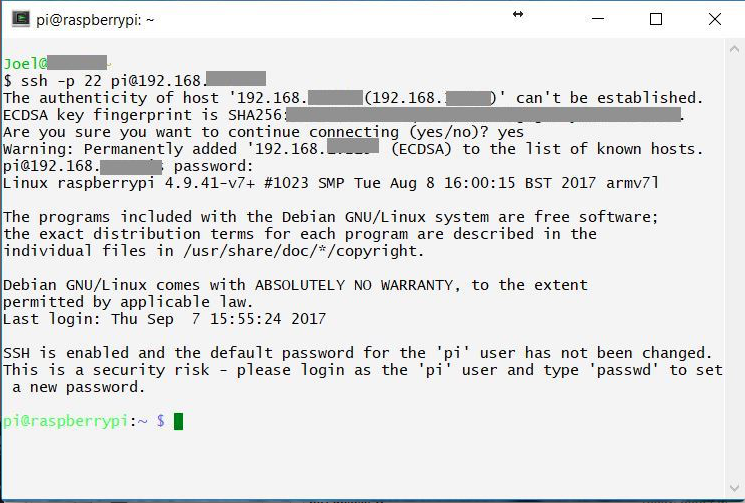 One of the first priorities after setting up a new Raspberry Pi should be changing the default password. The default username is pi and the password is raspberry. For security, change the password to something else. (Make it more secure than “raspberry”!) Changing the password is very easy; just log in, and run the following command and follow the prompts.
passwd
Set Static LAN IP Address
If you wish to specify a static LAN IP address for your Raspberry Pi, read on. If your network has a DHCP server, this step is optional. I’m setting a static IP for mine outside of the DHCP lease range.
While logged in to the command prompt (or in a terminal window if you’re running a version of Raspian with desktop), enter the following command:
sudo nano /etc/dhcpcd.conf
Of course, if you prefer an editor other than nano, use something else; I prefer vim but am using nano for this tutorial because it’s much more beginner friendly.
Scroll down to the bottom of the file and find the “Example static IP configuration” section.
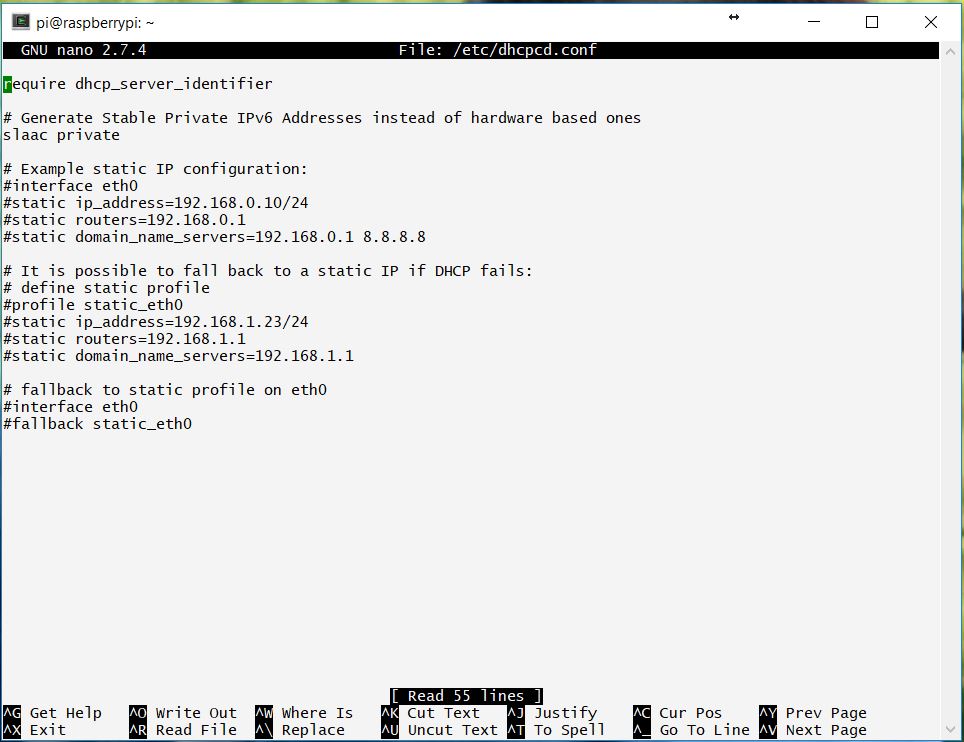
Un-comment the appropriate lines to set your desired address, gateway, and DNS servers. (All lines beginning with # are comments; to make a line take effect, remove the #) For instance, when you are finished, that section of the file may look something like this:
# Example static IP configuration:
interface eth0
static ip_address=192.168.0.25
static routers=192.168.0.1
static domain_name_servers=192.168.0.1 208.67.220.123
In the example above, it should be immediately obvious that we are setting an IP address of 192.168.0.25, our gateway is 192.168.0.1 (that’s the “routers” directive), and we’re setting two DNS servers: the primary one is our gateway / router, and the backup is OpenDNS. Set an appropriate IP address and gateway as required by replacing the example values above with your own.
If using Nano, press Ctrl + X to exit the file editor. When prompted whether or not Nano should save changes to the file, press “y” and then Enter; then press Enter once more to confirm that you want to over-write the file. With that done, reboot the Pi to make your change effective:
sudo reboot
Our Pi is running, its default password is changed, and it has a static IP address. The next RPi article will begin a deeper dive into the meat and potatoes of our home automation project!


All I can see of your SSH client is the logo. What is it called?
Cygwin.